
I finally remembered to take some pictures while in the process of wallpapering my current house remodel – something I kept forgetting with previous houses. I think adding wallpaper is one of the simplest DIY’s we can do with Sylvanian houses and it can yield high results. They know this, and you can easily find printable sheets online for some of the most popular houses – pretty patterns all ready for you to just cut out and stick onto the correct walls. Etsy is also full of helpful skilled people who have created great templates for lots of the houses. So if you have a classic or really popular style house, chances are you can find printable templates that can help you skip the more fiddly and sometimes bothersome parts of creating your own. But, if you want to save some money, or have a less common house, I’m prepared to show you how I very easily create my own templates.
For the wallpaper itself, I’ve mostly used scrapbook paper that I already had or that I’ve found in tiny prints that work with the scale. I’m sort of a stickler for scale and that can slow me down the most – finding a pattern I like that fits into the Littles’ world just so. We’ve also had printer issues for a while now, so I need to also avoid printing, more than I might otherwise do. Along with room templates online, you can also find scores of printable dollhouse wallpaper, some really beautiful patterns scaled down to dollhouse size. Official ‘dollhouse wallpaper’ does exist, and that is certainly another option. I did use a bit in one of my rooms in Beechwood Hall (the parents’ bedroom) plus in the main room shown at the bottom here, the blue & white floral. 1/12 scale is the most common for dollhouses, and while it’s not the actual scale of Sylvanian Families, it’s very close and works just fine for wallpaper and decor details.

I’m currently working on remodeling a Cedar Terrace house, also called the Three Story House (and also the same mold, just different original coloring to the Sky Blue Terrace). It’s actually a great house for showing how I do my wallpapering process, as you can remove the top level floor and thus have a much larger working space – making reaching everything much easier, plus taking pictures from various angles.
I begin with simple white printer paper, anything thin and readily available will work. Thin because you need to fold, bend and crease/ indent it. Readily available because I go through many sheets of it. I begin by inserting a piece of paper bigger than needed by just a little bit – too much bigger and it’s just really difficult to work it. Hold and fold it into place, using your fingernail to crease it into the edges and corners. Trim away the obvious excess, take a pencil and ruler and trace along the creases you made – creating an easier to see outline.


For windows I run my finger along the edges, creating an indent of the window edges. Repeat the tracing process with your pencil. For cutting out windows you can use your scissors or an exacto-knife on a cutting safe surface. Once you have the shape and all the windows cut out, you have created a template!

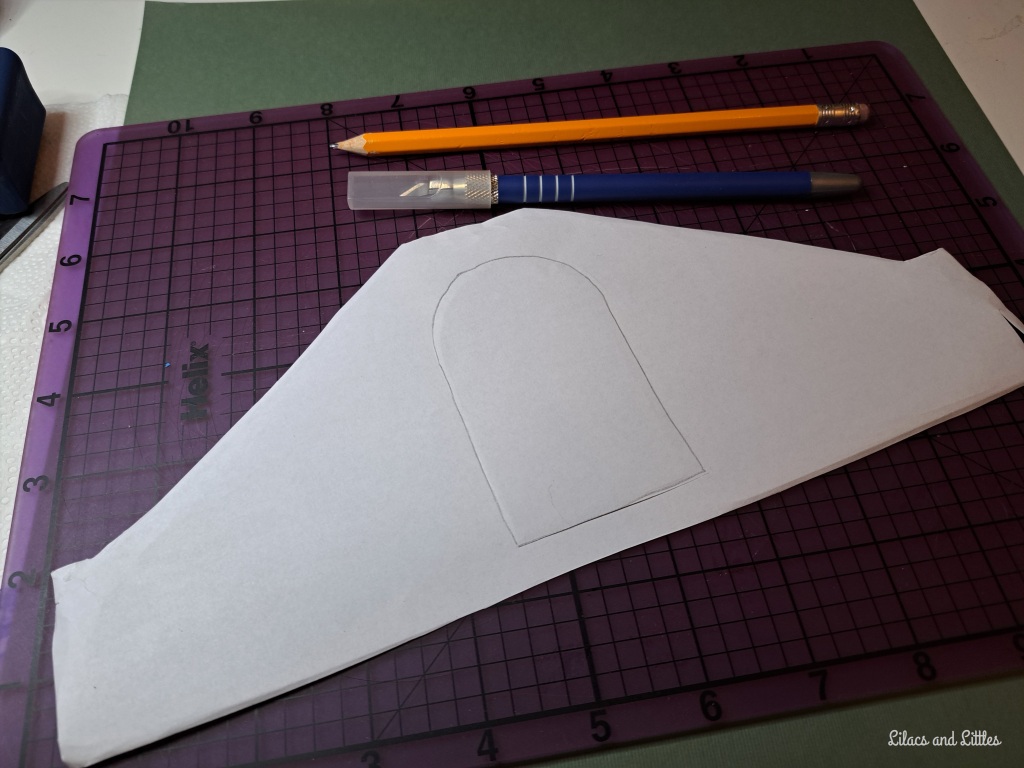


Once you have that finished template, you can trace it onto your final paper that you’ll be wallpapering with. A few minor, and helpful details – it might be helpful to somehow mark which side of the paper is ‘up’, as some can work in either direction, but most cannot. You don’t want to trace it onto a beloved piece of paper, cut it out and realize it was backwards and won’t work. I often work with just one or two large pieces of scrapbook paper, and by lining up the templates just so, can have enough for the whole room – but if I were to mess up, especially a large section – I may not then have enough of that exact paper. I also tend to use a ruler on all the straight bits, sure we can draw a straight line, and when tracing it’s right along what you creased. I think this is similar to the “measure twice, cut once” motto – when you can, create lines with a straight edge, be that a ruler or similar.
It also helps to keep placing that template back into the house and making sure it fits how you want it, and covers what you want it to. Check those corners. Many of the Sylvanian houses have a nice ‘chair rail’ or ‘wooden panel’ section along the bottom part of the walls. Most of the pre-made templates are for above this section. When making our own we can decide if we want to incorporate that feature into our room or not. I’ve kept it in many rooms, but am actually papering over it in these examples. In this case, using a bit thicker paper works better, as thinner could show the shape underneath when pressed.
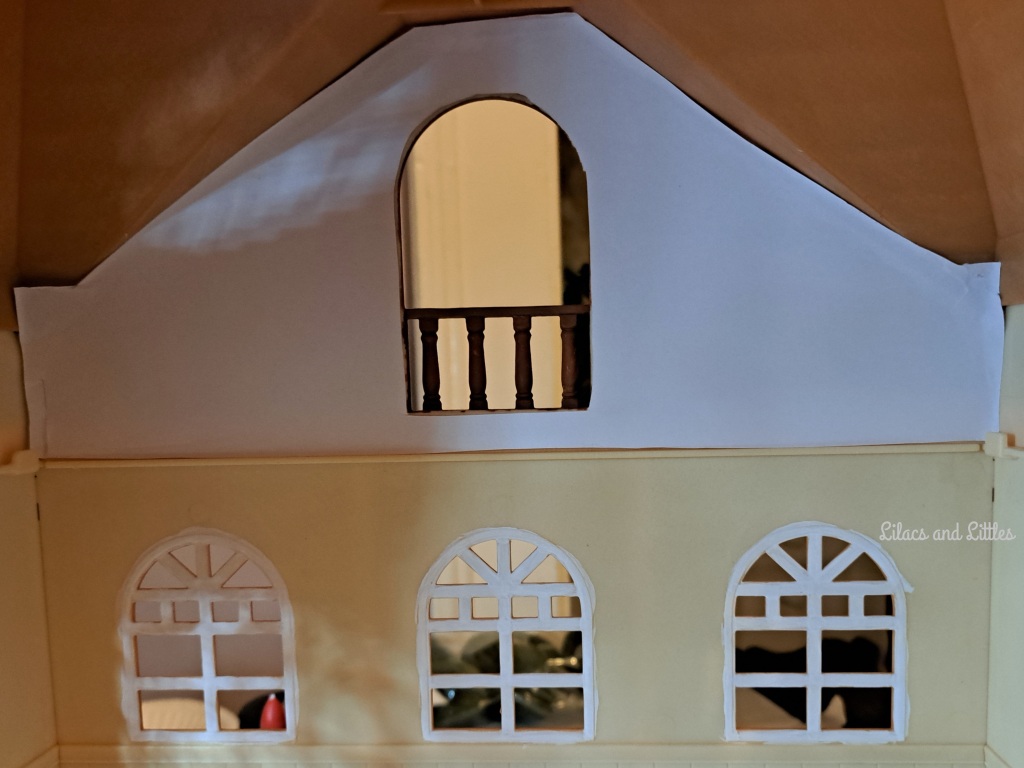


Now there are final checks before sticking the paper into the house. Insert the final papers, check how they fit, crease the edges and trim if needed. There are also often little bits and places that stick out oddly, such as above doors. Some you can press and crease around as you’re making the template, others it may be easier to take a pencil and mark where they are on the final piece of paper, cutting them out as needed.
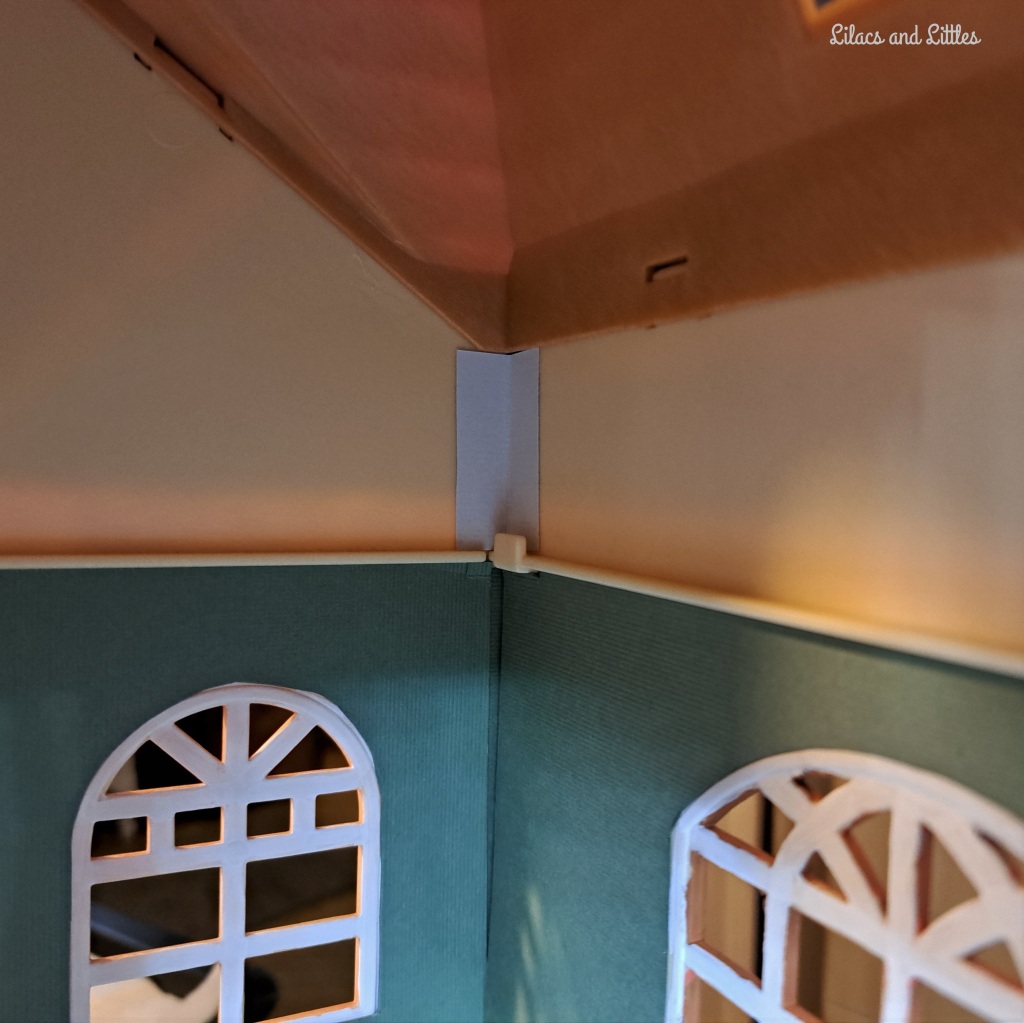
I also get annoyed by corners, as our templates can fit perfectly, but when light shines through a slight gap appears. I’ve created my own little solution to this – adding bits of paper just in the corners, behind the rest of the wallpaper. Or sometimes, as we place the paper it can lay a bit off, leaving a gap you didn’t expect. You can also stick tiny slivers to fill those gaps if you need to. Notice the corners in the pictures below.


The top two floors of the Cedar Terrace still need a lot of work, planning more details included. I’m not thrilled with how the doorway looks on the top floor, but am not that worried about it, as I want some sort of ‘trim’ around it and between the light blue wallpaper and the brown ceiling. I will probably end up painting the window trim in the top floor too. But the bottom floor, the one we’ve not really looked at yet – that room I have well planned out. I took some pics of it too, and for those I had some help.

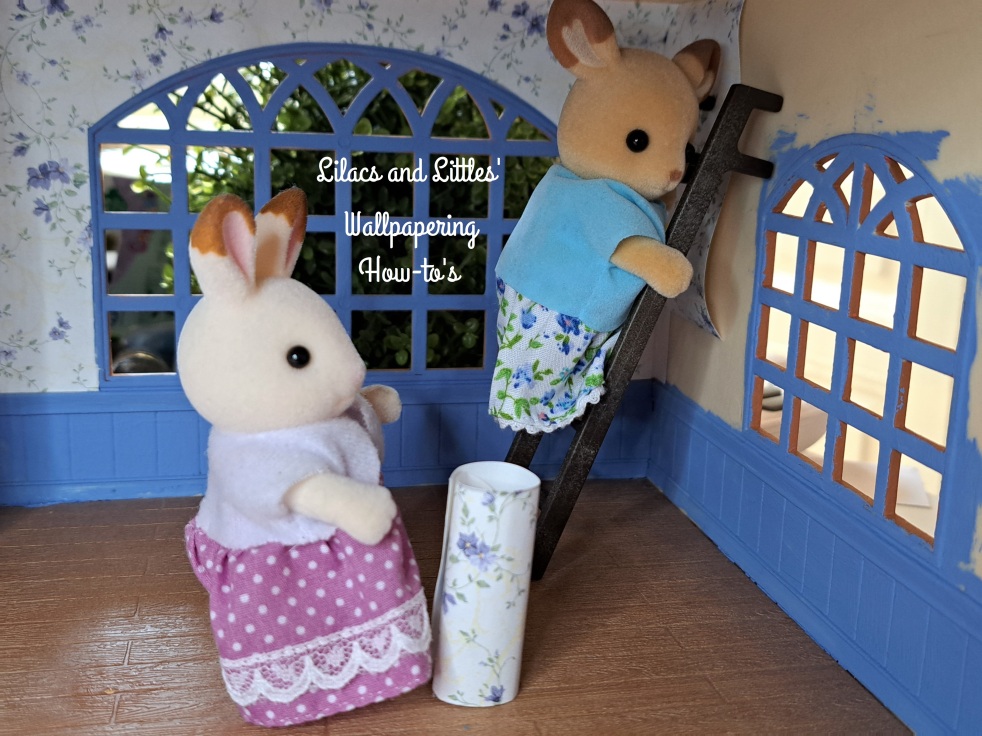
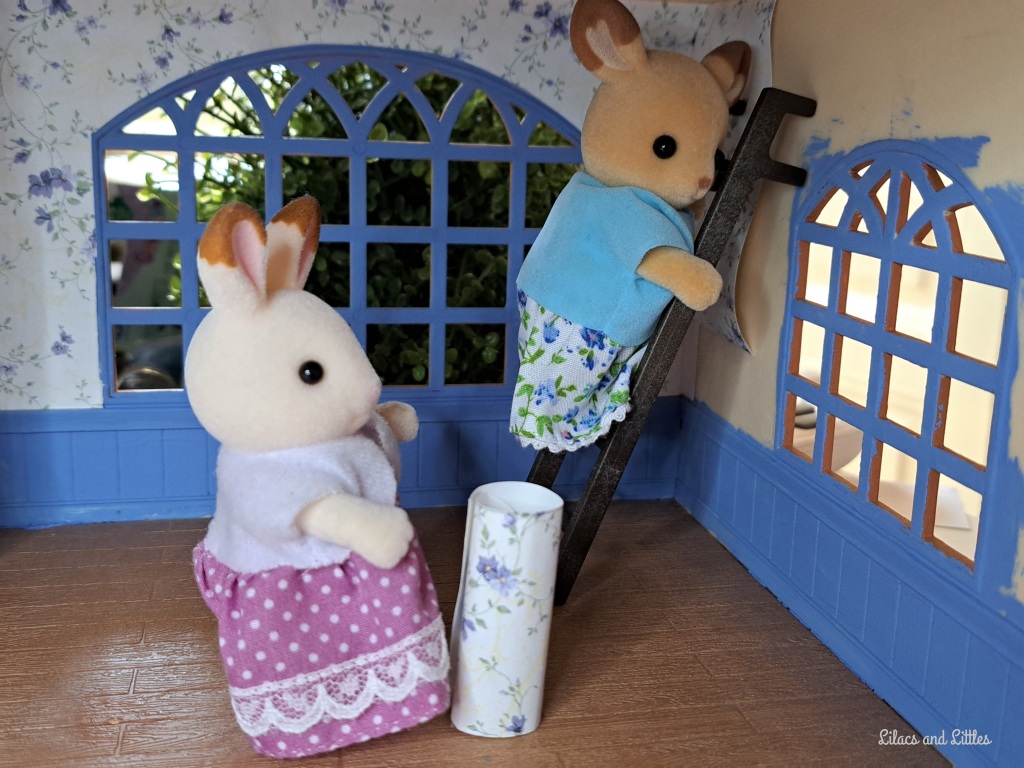
Cedar Terrace will be the home of the Buckley Deer family, so Agatha Buckley has been very involved in the remodeling process. Rupert was very helpful in the painting of the trim, but for the wallpapering Agatha sought the advice of Patricia Chocolate. Patricia has done a lot of putting up wallpaper in her life. She and Agatha were very proud of themselves as they finished up the main room of Cedar Terrace.
A few details that these next photos highlight – how do we attach the paper to the walls? I use double-sided tape, simple and effective. I tend to focus on the corners with a few well-placed bits in the middle space. Practice placing the paper without the tape uncovered, picking a side (or the top or bottom) and settling it in place from there, pressing outward smoothly. And press lightly initially, in case you need to pull it off and try again if it ends up less than straight. I’ve pulled a few off multiple times before finally getting it on right, pressing it down harder then. And yes, an open space such as the top floors of this house, are great to start on, or the openness of the Sweet Raspberry house (that was my first wall-papering project). Smaller houses, with less space and less ability to see from all angles, can be tricky.


The bottom room also has a very tricky section around the front door – most houses have a few spaces that are harder than others to paper. I spent a lot of time working on the template, and adjusting it. I’d tackle these sorts of sections AFTER you’ve done simpler walls first, work up to them and grow your confidence. You can also chose to leave them as-is, maybe only paper one wall in such a room, as a ‘feature wall’.


Agatha, Patricia, and myself all hope this has been helpful – we all think wallpaper can change a room substantially, and it’s less permanent or possibly messy than paint. Have you added paper into your house yet? Are you maybe encouraged to try it now? Let me know which of my tips helped you the most! Happy Little home decorating!

I love your tip about putting extra paper in the gaps, before putting on the wallpaper! What a beautiful transformation already! I love the wallpaper you, Agatha, and Patricia put up!
LikeLiked by 1 person
Ah, thank you Sophie! 😊
LikeLike
The blue windows look perfect ! Amazing job! I love the floral wallpaper on the ground floor. It matches Agatha´s dress perfectly.
Thank you for all the tips . A very useful tutorial for wallpapering.
Looking forward to seeing the Buckley´s home when you have finished decorating it.
(I left a comment on your previous post under my real name instead of Cutata.)
Happy Holidays and Happy New Year!
LikeLiked by 1 person
Happy New Year Cutata/Maria! Thank you so much for your comments and encouragement. 🙂 I’m super happy with the ground floor room, so is Agatha! LOL
LikeLike